How to Connect Powered Speakers to Mixer? Clear Sound Guide
Connecting powered speakers to a mixer can enhance your audio experience by providing better control over sound quality and distribution. Whether you’re setting up a home recording studio, preparing for a live event, or simply enhancing your audio, understanding how to connect powered speakers to a mixer is invaluable. We’ll explore two primary methods for … Read more
Connecting powered speakers to a mixer can enhance your audio experience by providing better control over sound quality and distribution. Whether you’re setting up a home recording studio, preparing for a live event, or simply enhancing your audio, understanding how to connect powered speakers to a mixer is invaluable. We’ll explore two primary methods for establishing this connection: using correct cables and utilizing a wireless system to keep your space tidy and free of clutter.
Understanding Basic Connections
Before diving into the specifics, it’s essential to grasp the basics to connect powered speakers to a mixer. The quickest solution involves using balanced cables. Specifically, you’ll need a pair of XLR cables. These should run from the mixer’s main output, connecting one cable to the left channel and the other to the right channel of your speakers. This setup ensures that your audio is distributed evenly across both speakers, enhancing the listening experience.
However, if terms like “audio mixer,” “XLR,” or “TRS” are unfamiliar, don’t worry. We’ll break down these concepts further, making sure you understand each step of the process. Additionally, we’ll provide easy-to-follow diagrams to simplify the connection procedure, allowing you to set up your audio system with ease.
Choosing the Correct Type of Connection
Understanding the different types of audio connections is crucial for setting up your system correctly. The two most common connectors in audio equipment are the XLR and the 1/4” Jack plugs. These can be used for both balanced and unbalanced connections, depending on your settings.
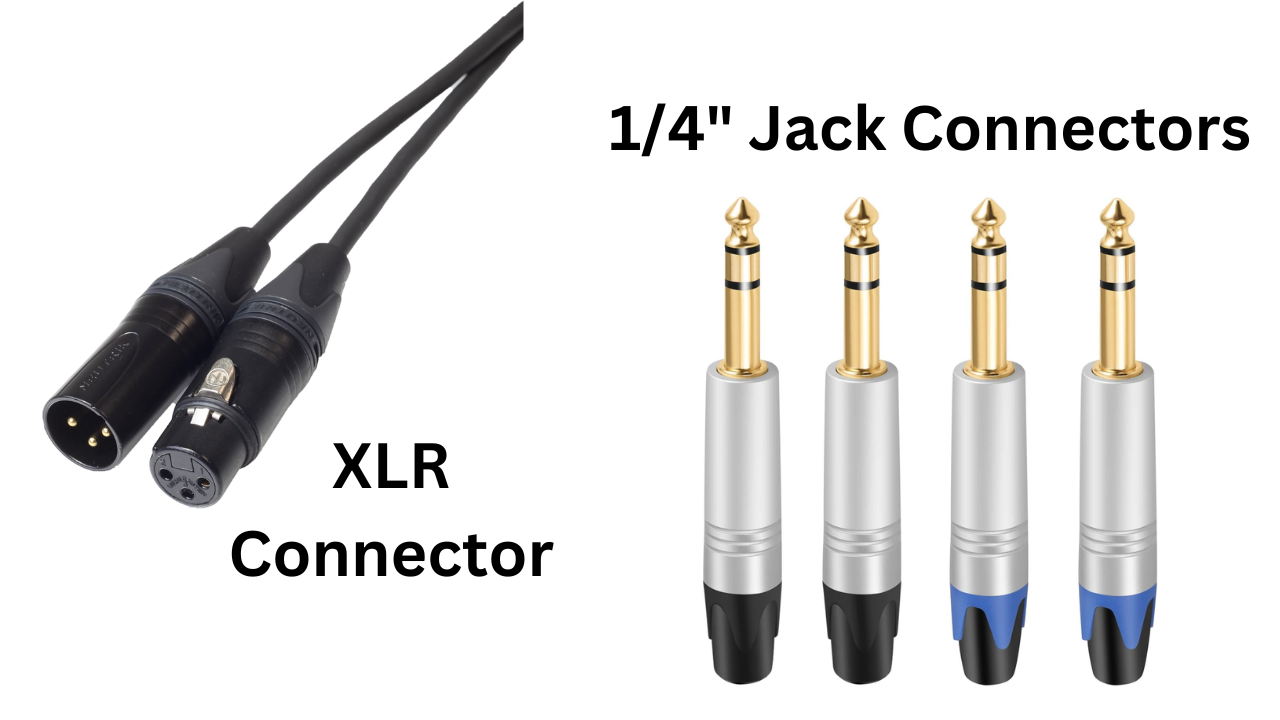
XLR Connectors
The XLR cable is a professional audio standard that offers a balanced connection. It features three pins: positive (red), negative (black), and ground (cable shield). The key advantage of using XLR connectors is their ability to cancel out noise, making them ideal for long cable runs. Balanced signals, such as those transmitted by XLR cables, are less susceptible to interference from RF signals or ground loops. This makes them a preferred choice for professional audio setups, especially when cables exceed 10 feet in length.
1/4″ Jack Connectors
Alternatively, the 1/4″ Jack connector, also known as a phone jack plug, is widely used for analog audio signals. It comes in two variations: the balanced TRS (Tip, Ring, Sleeve) and the unbalanced TS (Tip, Sleeve). Choosing the right type of 1/4″ connector depends on your specific needs and the nature of your audio.
For optimal audio quality and noise reduction, it’s recommended to use balanced connections, such as TRS or XLR. These connectors are designed to measure audience engagement and site statistics to understand how your audio setup influences the overall experience. Including details about managing these connections can be crucial for those looking to develop and improve new ways to connect and enhance their audio systems. If you’re in need of purchasing these cables, consider their length based on the distance between your powered mixer and speakers, and remember that balanced cables offer significant advantages in maintaining sound quality over longer distances.
Understanding Your Mixer’s Output Channels
When you’re setting up your audio system, the mixer is a central component that might seem complex at first glance. With its array of knobs and connectors, it’s easy to feel overwhelmed. However, developing and improving new techniques with a mixing console is more straightforward than it might appear. Essentially, a mixer is divided into input and output sections. The input section houses each channel strip, allowing you to control different aspects of the sound check coming from various sources. On the other hand, the output section includes the “Main Outputs,” “Subgroup Outputs,” and “Auxiliary Outputs,” each serving a specific purpose in routing the audio signal.
For the purpose to connect powered speakers, our focus will be on the Main Output of the mixer. This is where you’ll find the XLR cable or TRS connectors needed to send audio to your powered speaker. Identifying the Main Output is a crucial first step in setting up your system for optimal sound distribution.
Locating the Main Output on Your Mixer
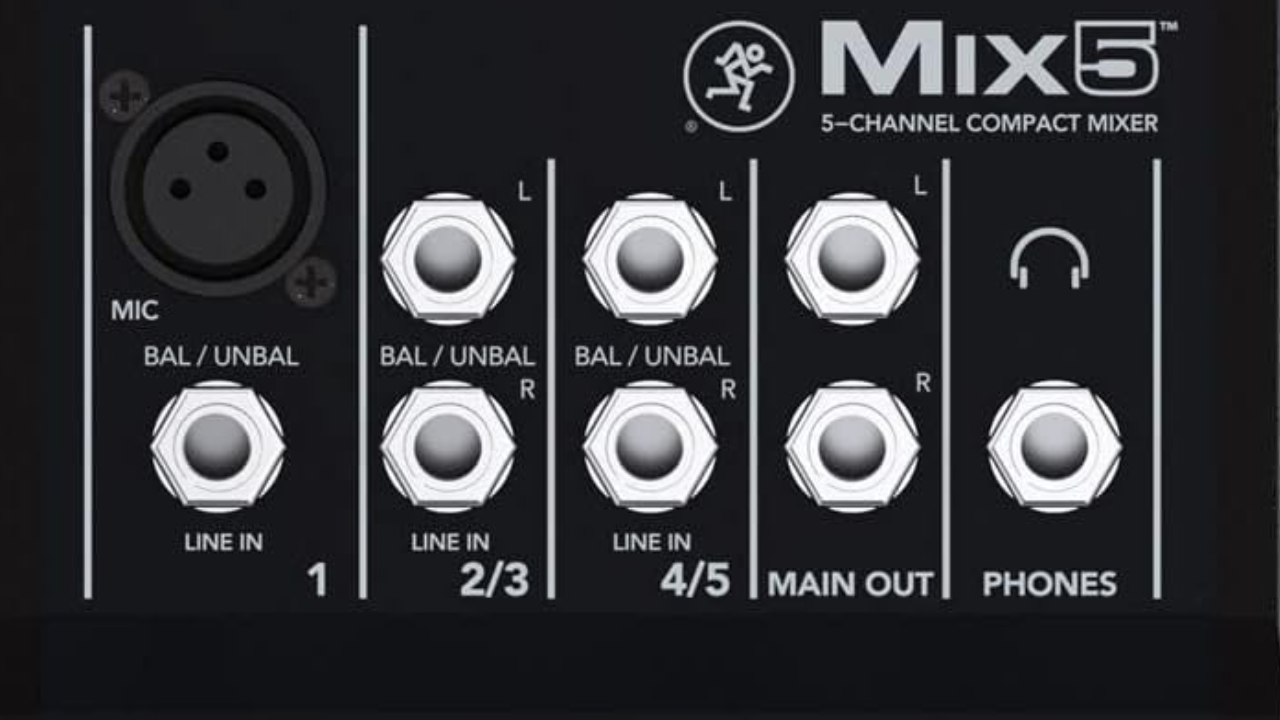
Before you proceed with any connections, it’s essential to locate the Main Output connector on your mixer. This will typically be an XLR or TRS output, and it’s from here that you’ll run the signal to your powered speaker. Generally speaking, familiarizing yourself with the mixer’s output section is key to a successful setup, ensuring that your audio is routed correctly through the system.
Connecting to Your Powered Speaker’s Input Section
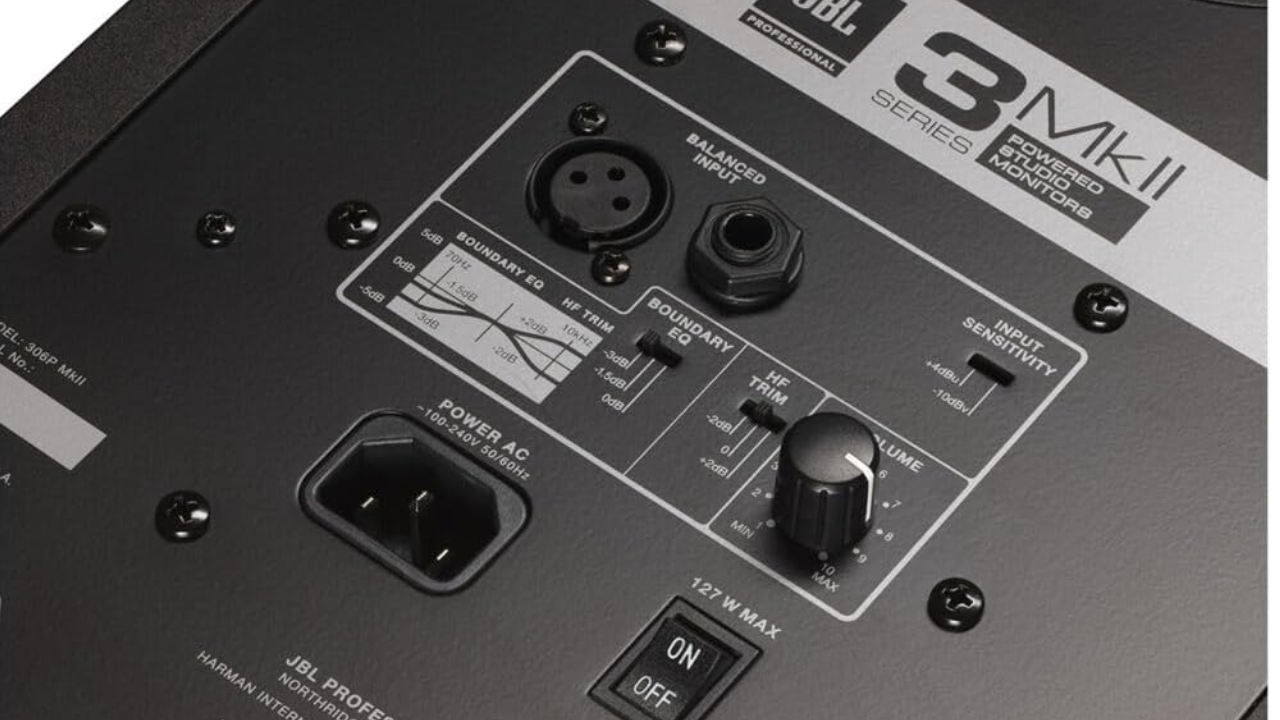
After identifying the output signal source on your mixer, the next step is to connect subwoofer and powered speakers to create a comprehensive audio system. Most powered speakers are equipped with two input channels, offering a variety of connectors to accommodate different types of cables, including the correct cables for your setup.
Using the Combo XLR/TRS Connector
The majority of powered speakers feature a Combo XLR/TRS input connector, which provides flexibility in choosing between balanced XLR and TRS connections. This versatile connector is what we’ll use to link the mixer with the speaker. Depending on your settings, this connector can be vital in managing unbalanced signals effectively.
If your setup necessitates using an unbalanced TS connector due to the cable you have and a shorter distance, you can connect it to the same input used for TRS connections. This flexibility allows for various configurations based on the equipment and cables at your disposal.
Adjusting the MIC/LINE Switch for Optimal Sound
It’s important to note that some powered speakers come with a MIC/LINE switch located near the GAIN/VOLUME knob. Track outages and protect your equipment by ensuring that it’s set to “Line.” This adjustment is crucial because powered speakers are designed to be more sensitive to microphones, which require additional gain to function properly. However, when connecting a speaker to a power amp, the signal is at line level, necessitating less amplification. Adjusting this switch accordingly will help achieve the best audio quality, ensuring that your system is correctly calibrated for the signal it’s receiving.
Connecting Powered Speakers to a Mixer
Connecting powered speakers to a mixer is an essential skill for anyone looking to enhance the quality of their audio setup. Whether you’re setting up for a live performance, installing a home studio, or managing sound at an event, knowing how to connect your equipment correctly is crucial. This guide will develop and improve new methods to connect powered speakers to a powered mixer using both cables and a wireless system, ensuring a clear, high-quality sound output.
Preparing to Connect Using Cables
Before you start plugging in cables, it’s important to take a few precautionary steps to protect your equipment. Firstly, ensure that both the powered mixer and the powered speaker are turned off. This prevents any sudden noises or pops that could potentially damage your gear. Next, lower the master volume faders on the mixer to their minimum position and do the same for the active speakers. This setup stage is crucial for a smooth and safe connection process, based on past activity to measure the effectiveness of your setup.
Connecting Cables to the Mixer and Speakers
With your equipment safely prepared, you can begin connecting the cables. Start by attaching the cables to the Main Output of the mixing console, ensuring one cable is connected to the left channel and the other to the right channel. Then, connect the opposite ends of these cables to the corresponding left and right active speakers. This step is pivotal in establishing the audio link between your mixer and speakers, influenced by things like the specific needs of your setup and the general location of your equipment.
Finalizing the Cable Connection
After all the cables are connected, you can power on your speakers and the mixer. Set the volume on each speaker to a mid-level position. If your mixer uses faders, adjust the left and right channel faders to the “0” (0 dB) or “U” (Unity Gain) position. For mixers with a master volume knob, turn it to a halfway point. Play some music or use a microphone to test the volume and sound quality, adjusting the volume and EQ settings until you’re satisfied with the audio output, aiming to deliver and measure the audio performance effectively.
Opting for a Wireless Connection
For those looking to avoid the clutter of cables, a wireless audio system offers a neat solution. Systems like the Alto Professional Stealth MKII-UHF allow you to replace long cable runs with a reliable wireless connection, supporting distances up to 200 feet without compromising on audio quality. This option is particularly appealing for mobile DJs, event organizers, or anyone looking to maintain a clean, professional setup, based on your viewing and your location preferences for audio management.
Steps to Connect Wirelessly
- Turn off your mixer and speakers to avoid damage.
- Lower all volume controls to minimum settings.
- Connect the mixer’s output to the wireless system’s transmitter using XLR or 1/4” TRS jack plugs.
- Connect the receiver units to each powered speaker with XLR to TRS cables.
- Power on the speakers, receiver units, transmitter, and mixer in that order.
- Set the transmitter to Mono or Stereo mode to align with your mixer’s output.
- Adjust the transmitter’s volume levels for balanced sound output.
- Select a broadcast channel on the transmitter and match it on the receiver units.
- Test the connection by playing music through the mixer and gradually increase the volume to a comfortable level.
- Use EQ settings to fine-tune the audio to your preferences, possibly adding more speakers for a richer sound experience.
Conclusion
In conclusion, to connect powered speakers to a mixer is a fundamental task that can significantly enhance your audio experience, whether for live performances, studio recordings, or public events. By following the detailed steps outlined for both cable and wireless connections, you can ensure a seamless integration of your audio equipment, leading to crisp, clear sound output. Remember, the key to a successful setup lies in careful preparation, correct connection procedures, and final adjustments to volume and EQ settings. With these guidelines, even those new to audio equipment can achieve professional-quality sound, based on general location and data to tailor the setup for audience engagement and site dynamics, making your events or recordings sound better than ever.