Last Updated on March 17, 2025 by Muisc Pro Editorial Team
It’s easy enough to spend lavishly on the latest and greatest in studio monitor equipment, but place them wrong, and it’s like driving a Lamborghini around a parking lot. To create the perfect home recording environment, it isn’t just about getting the right equipment, it is also all about room acoustics management.
Whether you’re an excited novice looking to set up your first studio or a seasoned pro looking to refine your space, how and where to position your monitors is absolutely vital.
Fret not, we’re here to help! In this article, we’ll cover all you need to know about placing your studio monitors to get the best sound in your space!
Studio Monitor Placement: An Introduction
Indispensable tools for the folks creating audio content, studio monitors are engineered for accurate sound reproduction. Unlike regular speakers, which often color sound to enhance the listening experience, studio monitors deliver a precise, accurate representation of audio recordings.
Like speakers, the effectiveness of monitors depends greatly on their proper placement in the room, leading to an optimal acoustic environment. Without proper placement, even the top-quality, pricey monitors can produce disappointing results that fail to translate on playback.
We’ll cover some practical techniques like the equilateral triangle setup, positioning tweeters at ear level, and using affordable acoustic treatments such as bass traps. Monitor placement is particularly important for home studios where you might face budget and space constraints that professional control rooms don’t often have.
Step-by-Step Guide to Studio Monitor Placement
You can easily achieve optimal sound with a strategic, systematic approach to monitor positioning.
Determine Your Optimal Listening Position
First, find the best spot in your room where you will be listening. Position yourself toward the front of the room and not dead center. In a rectangular space, your listening position is usually about one-third to one-half the length from the front wall.
This avoids frequency notes, which are the spots where certain frequencies are unnaturally cancelled out or amplified. Center yourself equally between the side walls to ensure a balanced soundstage which is critical for accurate stereo imaging.
Setting Up the Equilateral Triangle
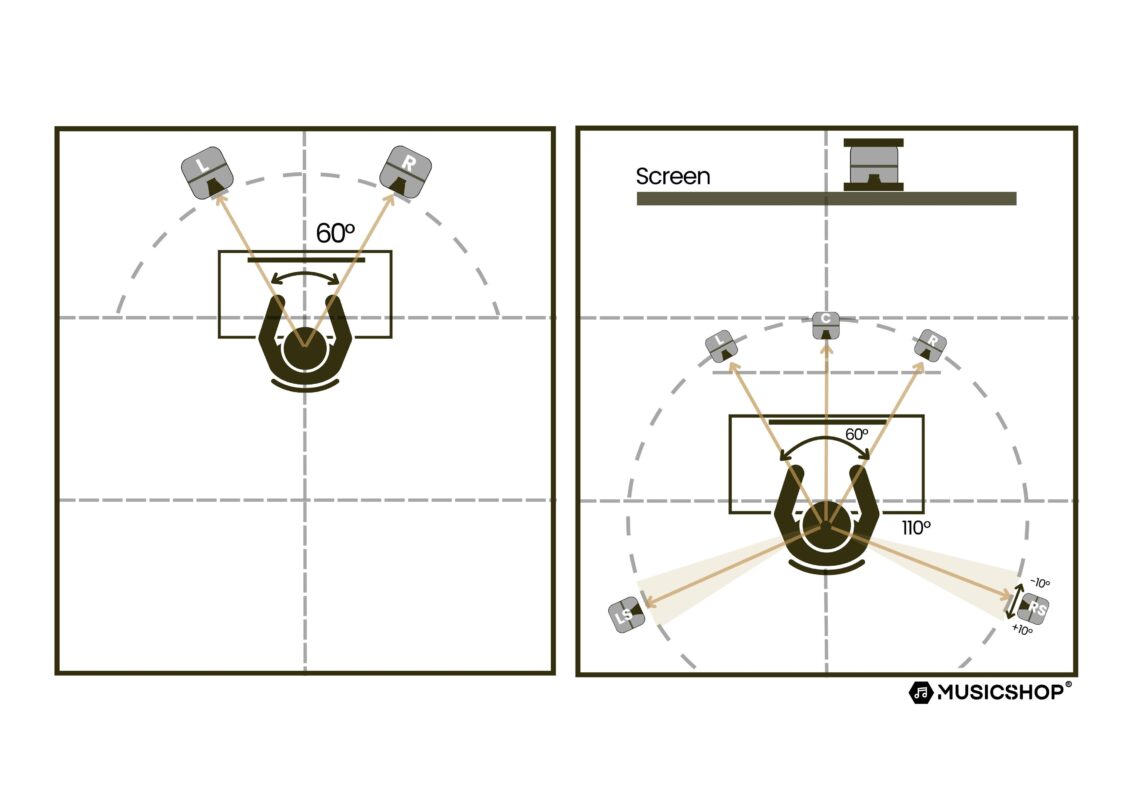
Then, with your two monitors, form an equilateral triangle with your listening position as the third point. The distance between your monitors should be about the distance from each monitor to you.
For example, if your monitors are placing 2 meters apart, then your listening positioning should be 2 meters from each one. This setup minimizes phase issues and stereo imaging. Angle the monitors inwards at about 30 degrees so the sound converges at your ears.
Positioning Monitors at Ear Level
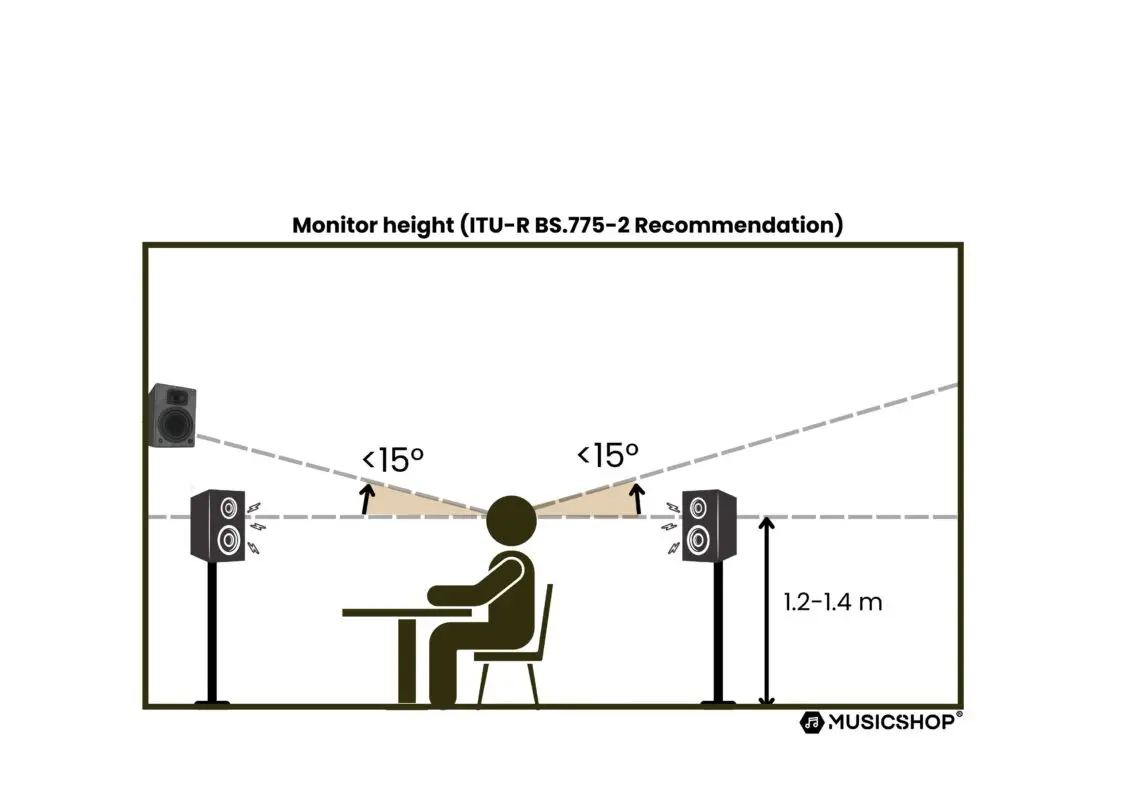
As important as distance, height matters. The tweeters, which are the drivers responsible for high frequencies, should align directly with your ears when you are seated in your listening position. This helps the treble frequencies preserve tonal accuracy when they reach you directly.
Whether a woofer or a tweeter takes priority is a red-hot topic in the audio world, but the general consensus is that tweeters should be at ear level. To avoid vibrations or early reflections, you can use stands or shelves instead of placing monitors on your desk. Isolation pads can further decouple the monitors from surfaces, refining sound clarity.
Nearfield Placement for Maximum Clarity
If you’ve got a nearfield setup, position your monitors about 1 to 1.5 meters from your listening spot. This can reduce the impact of room reflections, allowing you to enjoy a more direct , clearer sound.
Nearfield monitoring is particularly relevant with home studios as controlling the room acoustics can be challenging.
Keeping Monitors Away from Walls and Corners
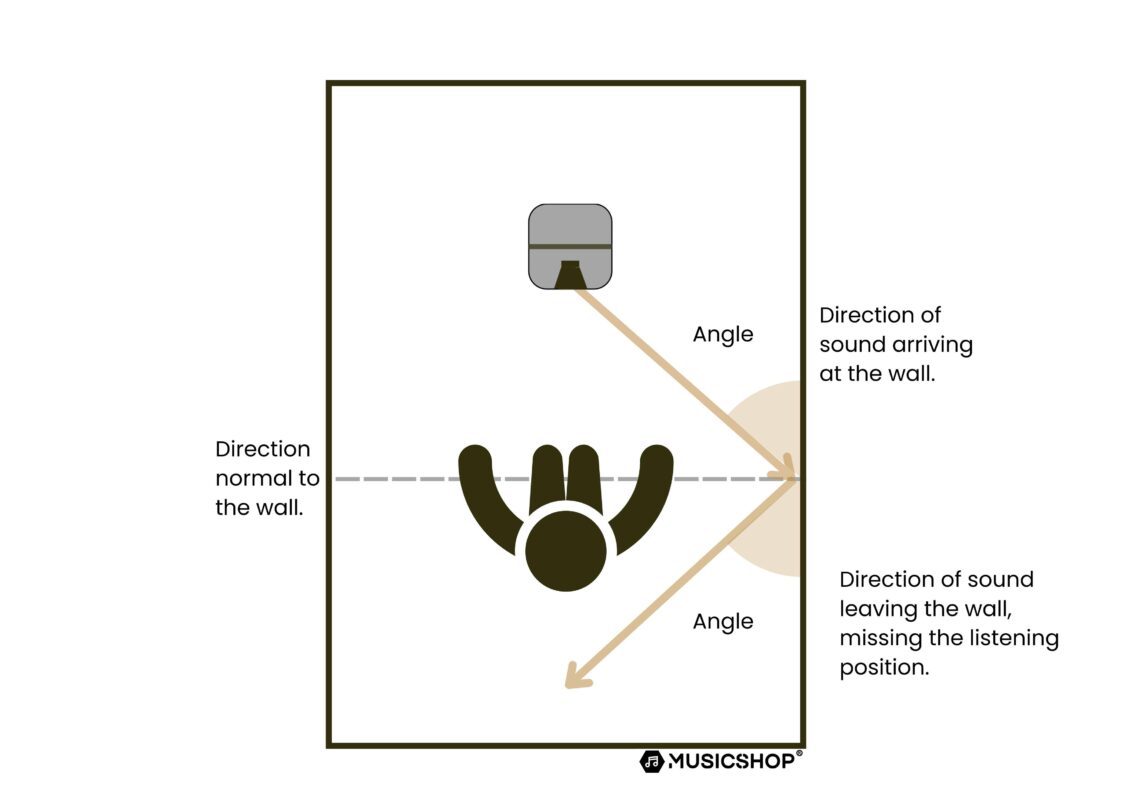
Walls and corners can exaggerate bass frequencies due to sound reflections, so keep monitors a few inches away from them. In particular, corners amplify low-end buildups.
If you can’t avoid them, you can place isolation pads to help prevent vibrations from transferring to the surface, especially if you have a compact space.
Managing Room Acoustics with Treatments
Low frequencies can accumulate in corners and along walls, creating resonances that interfere with sound quality.
That’s when bass traps come in.
You can place them in trihedral corners where two walls and the ceiling meet. Foam bass traps are extremely affordable and do wonders for the sound quality, especially in smaller rooms. For better low-frequency control, fiberglass or mineral wool traps can deliver superior performances but cost a little more than foam.
If you’re on a particularly tight budget, you can DIY your own bass trap by constructing a simple triangular frame from wood and filling it with insulation such as fiberglass or mineral wool.
Fine-Tune Your Setup
Once you’ve done all the above, now it’s time to test your setup! Use tracks like pink noise or sine sweeps to identify frequency imbalances and make small adjustments to smooth out the bass response.
In small rooms, tweaking your monitor positioning can make a huge difference. For advanced users, room correction software or EQ adjustments can further enhance your sound and give you professional grade accuracy.
Don’ts: Common Mistakes to Avoid
Here’s a list of no-no’s to avoid when you’re doing your studio setup.
- Placing monitors too close to walls or corners, leading to excessive bass.
- Neglecting ear-level tweeter placement or incorrect speaker height can distort sound.
- Imbalanced placement throws off the stereo imaging.
- Sitting too far or close to monitors can cause an unnatural stereo image.
- Tilting monitors at the wrong angle disrupts sound.
- Placing monitors in an untreated room with bare walls and hard surfaces causes reflections and sound distortion.
Do’s: Tips for Getting The Best Sound
- Keep at least 6–12 inches of space between the monitors and the wall.
- If necessary, use bass traps or boundary EQ adjustments.
- Position tweeters at ear level for the best listening experience.
- Have an equal distance between both monitors.
- Have both monitors and your listening position the same distance apart, forming an equilateral triangle.
- Keep monitors angled slightly toward your ears for optimal high-frequency clarity.
- Use monitor isolation pads or stands to prevent vibrations and enhance clarity.
- Use acoustic panels, bass traps, and carpets to improve sound accuracy.
Final Thoughts on Studio Monitor Placement
Now that you know how to optimize your studio monitor placement, you might want to make some adjustments.
You’ve spent a pretty penny on your sound equipment, and it would be a shame not to unleash its full potential! Good luck!